How to publish your book on Bookmundo?
If you’ve been lurking on our website, wondering how to publish your book on our platform but not wanted to go so far as to create an account to find out, this article is for you! In it, we’ll be providing a thorough explanation of each step in the publication process.
Let’s start at the beginning: creating your book!
Create your first book
When you go to our website you can log in at the top right corner under “Login”. If you are new and want to register, you will find a red “start now” button in the middle of the start page. After logging in you will arrive at the self-publishing platform itself. On the left, you will find a menu containing all the functions you need to set up your account. It also gives you access to your sales results, which is a nifty feature if you want to gauge the success of your marketing efforts.
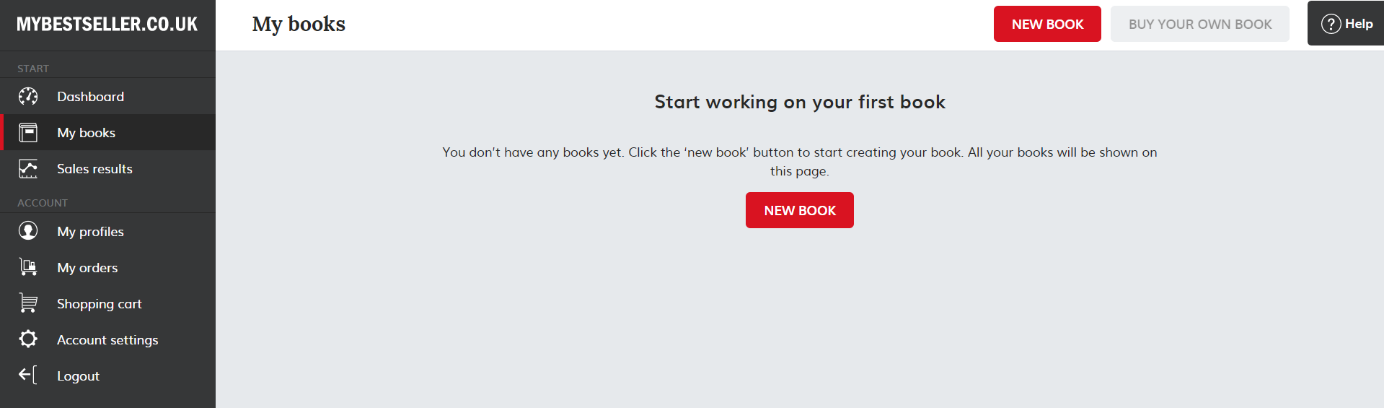
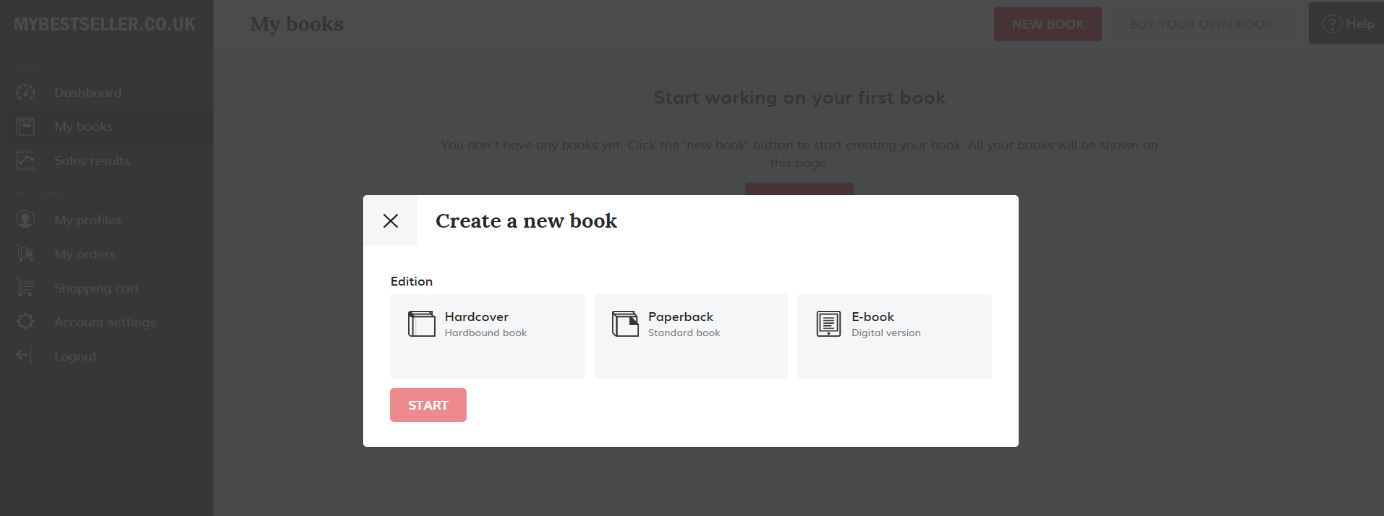
Now click on “my books” in the left-hand sidebar menu. This is where the book-creation process starts. To start creating a book, click on “new book”. The first choice you’ll be presented with is whether you want to create a hardcover, paperback, or e-book. These options are not mutually exclusive, so don’t worry if you’re not sure about your preferred format – all of these options will remain open to you. In fact, after publishing a print book, you’ll immediately be given the option to publish an e-book version as well, and vice versa.
 |
 |
After you have chosen your preferred format there are seven simple steps that you have to follow. You have to finish each individual step completely before you can go to the next.
Step 1: General information about the book and author
In the first step, “general information”, you’ll be filling in some details about the book you’re planning on writing. Here you’ll also enter the title of your book, as well as technical specifications like paper type and cover finish.
Step 2: Do you want an ISBN number?
After completing this first step, it’s time to decide whether you want an ISBN number. This is often a point of confusion when it comes to self-publishing.
To put it simply, the ISBN (International Standard Book Number) is like your book’s fingerprint; it’s a unique code used to identify your book around the world. So, pretty cool – but why do you actually need one?
Well, technically – you don’t.
However, if you want to put your book up for sale in book stores (other than our own), such as Amazon or Barnes & Noble, then you will need to buy an ISBN for your book. Without it, your work will be impossible to log in to the bookshops’ databases, and they won’t be able to order copies when someone buys your book. You only need one ISBN per book, no matter how many places you want to sell it in.
If, however, you only want to sell your book in our online store or on your own website/social media you do not need an ISBN. While the reach of these methods obviously cannot compete with that of international conglomerates like Amazon, they do result in a much higher margin per sale, as there is no bookstore in the equation taking a cut of the profits.
Step 3: Upload your manuscript
The third step involves uploading your manuscript. We assume that you’re almost finished with your manuscript at this point so that any re-uploads contain minimal adjustments; drastic changes in page numbers might cause problems with your previously selected book specifications.
Different authors write using different programs and work with a variety of supporting software. If you don’t feel experienced enough to format an entire book in your chosen word processing software, you can always make use of one of our Microsoft Word templates to give your manuscript a professional look. Make sure to review your layout critically before finally uploading the manuscript.
 |
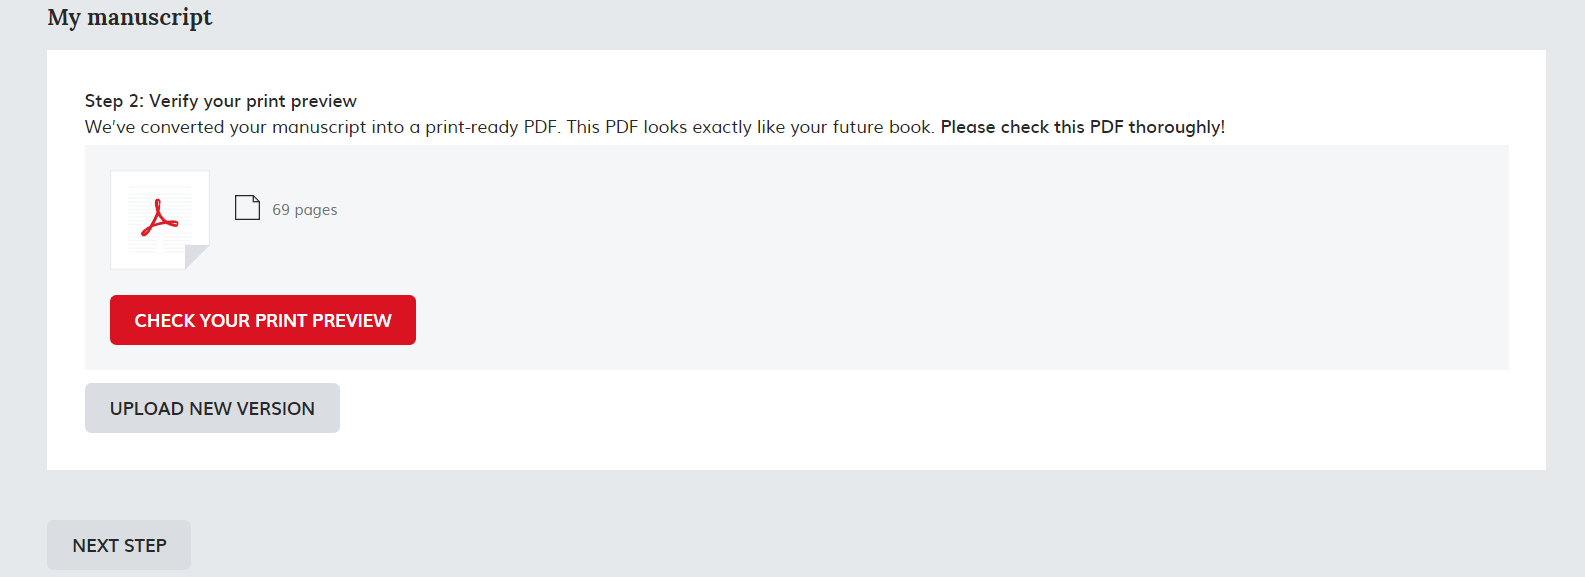 |
Once you have successfully uploaded your manuscript it will automatically be converted into a PDF on our website. The converted file is ready for printing!
We want to emphasize again that it is important that you have checked your manuscript thoroughly! This is your final draft, so make sure to have weeded out any mistakes – triple-check your spelling, grammar, or layout. Even better: have someone else read your work as well. You can of course change and re-upload the manuscript should you discover any errors.
Step 4: Book information
In this step, you enter theme- and genre-related information about your book, as well as a short description and a blurb. This allows us to categorize your book making it easier for others to find and for you to market.
Step 5: Cover design
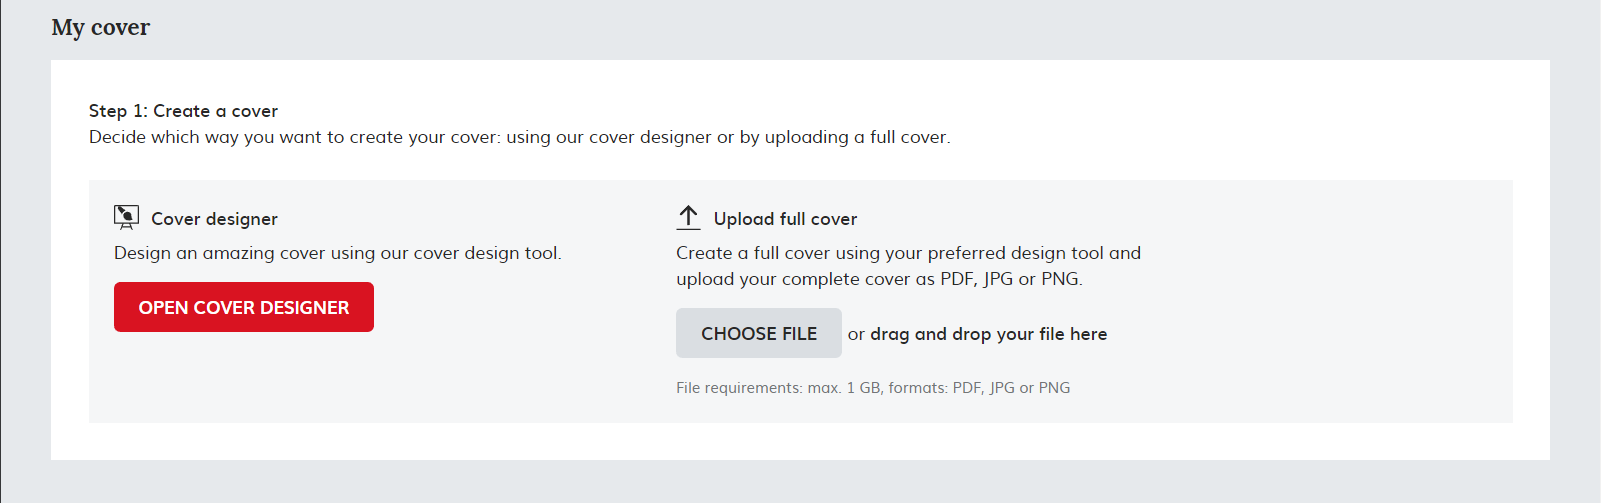
Now it’s time for the most fun part of the self-publishing process – creating and/or adding a cover!
 |
 |
You have two options in this step; you can either upload a PDF, JPG, or PNG of an already completed cover, or you can make use of our cover designer to create one from scratch! If you’re leaning towards the latter option, but aren’t sure where to start, check our articles on how to design and create your cover!
Step 6: Set the price for your book
Once you’ve reached this step, the hard part is definitely over. This is where you decide how much you want to sell your book for. Using our (aptly named) “price calculator”, you can set the retail price of your choice and get a full, transparent overview of how much of that money goes directly to you, in addition to where exactly the rest of it goes. When you first get to this stage, we automatically generate a suggested retail price based on industry standards as well as printing and shipping costs.
You don’t have to follow our recommendation, however. Nevertheless, it’s worth keeping in mind that higher prices always affect the sales figures. You also have the possibility to publish your book “for personal use” (i.e. for yourself, friends, or relatives), and thus skip retail channels completely. Whether or not you want to sell your book to the public is completely up to you. This setting can be changed at any time, so you can choose to make your book available in stores at a later date, should you change your mind.
Step 7: Final check and conditions
The last step is mostly a formality. Here you are asked to confirm two things:
- The terms and conditions
- That you do indeed want to publish your book
Nevertheless, we advise you to take your time and check all the details you provided thoroughly. You may have changed your mind about certain things during the creation process without remembering to actually make the appropriate changes.
We usually recommend that you order a proof copy of your book before publishing it. Seeing your finished product in print may make you aware of certain mistakes or design flaws that you didn’t notice on your computer screen.
Once you’re satisfied, go ahead and publish your book!

That’s it – you’re now officially a published author. Not only that, but you enjoy the full creative rights to your created material.
Lastly, if you haven’t started already, we recommend you begin planning a marketing strategy. We’ve written an article on how to use social media for this very purpose, so check it out if you’re unsure of where to start. Of course, if you aren’t planning on selling your book, you don’t have to worry about this.
Do you have any questions? Check out our contact page to see how you can best get in touch with us.